> For the complete documentation index, see [llms.txt](https://docs.vagon.io/llms.txt). Markdown versions of documentation pages are available by appending `.md` to page URLs; this page is available as [Markdown](https://docs.vagon.io/teams/features/scim-provisioning.md).
# SCIM User Provisioning
SCIM (System for Cross-domain Identity Management) lets your identity provider create and remove Vagon team members automatically. When someone joins the directory group you sync, Vagon invites them to your organization; when they leave it, their membership is removed and their computer is released — without an admin doing anything by hand.
Vagon supports **SCIM 2.0** so any compliant identity provider can connect to it. This guide walks through **Microsoft Entra ID (Azure AD)**, which is the most common setup.
Only Team **Owners** and **Admins** can configure SCIM.
* **Provisioning creates a pending invitation, not a membership.** The person becomes a member when they accept — normally the first time they sign in through SSO, or via the invitation email. Invitations are valid for three months.
* **No computer is ever assigned automatically.** Assigning a computer stays an explicit action by a team admin.
* **Deprovisioning is immediate.** The membership is removed, the computer is released, and the person's access tokens are revoked.
{% hint style="info" %}
**SCIM and SSO are independent.** SCIM authenticates with its own token and works with or without [Microsoft Entra (Azure AD) Login](/teams/features/microsoft-entra-sso.md) configured. They're commonly used together — with SSO enabled, invited people are enrolled automatically on first sign-in instead of having to click a link in an email.
{% endhint %}
**Prerequisites**
* A Vagon Teams organization, with **Owner** or **Admin** access.
* Access to the [Microsoft Entra admin center](https://portal.azure.com/) with permission to register applications.
***
## Step 1 — Set up SCIM in Vagon
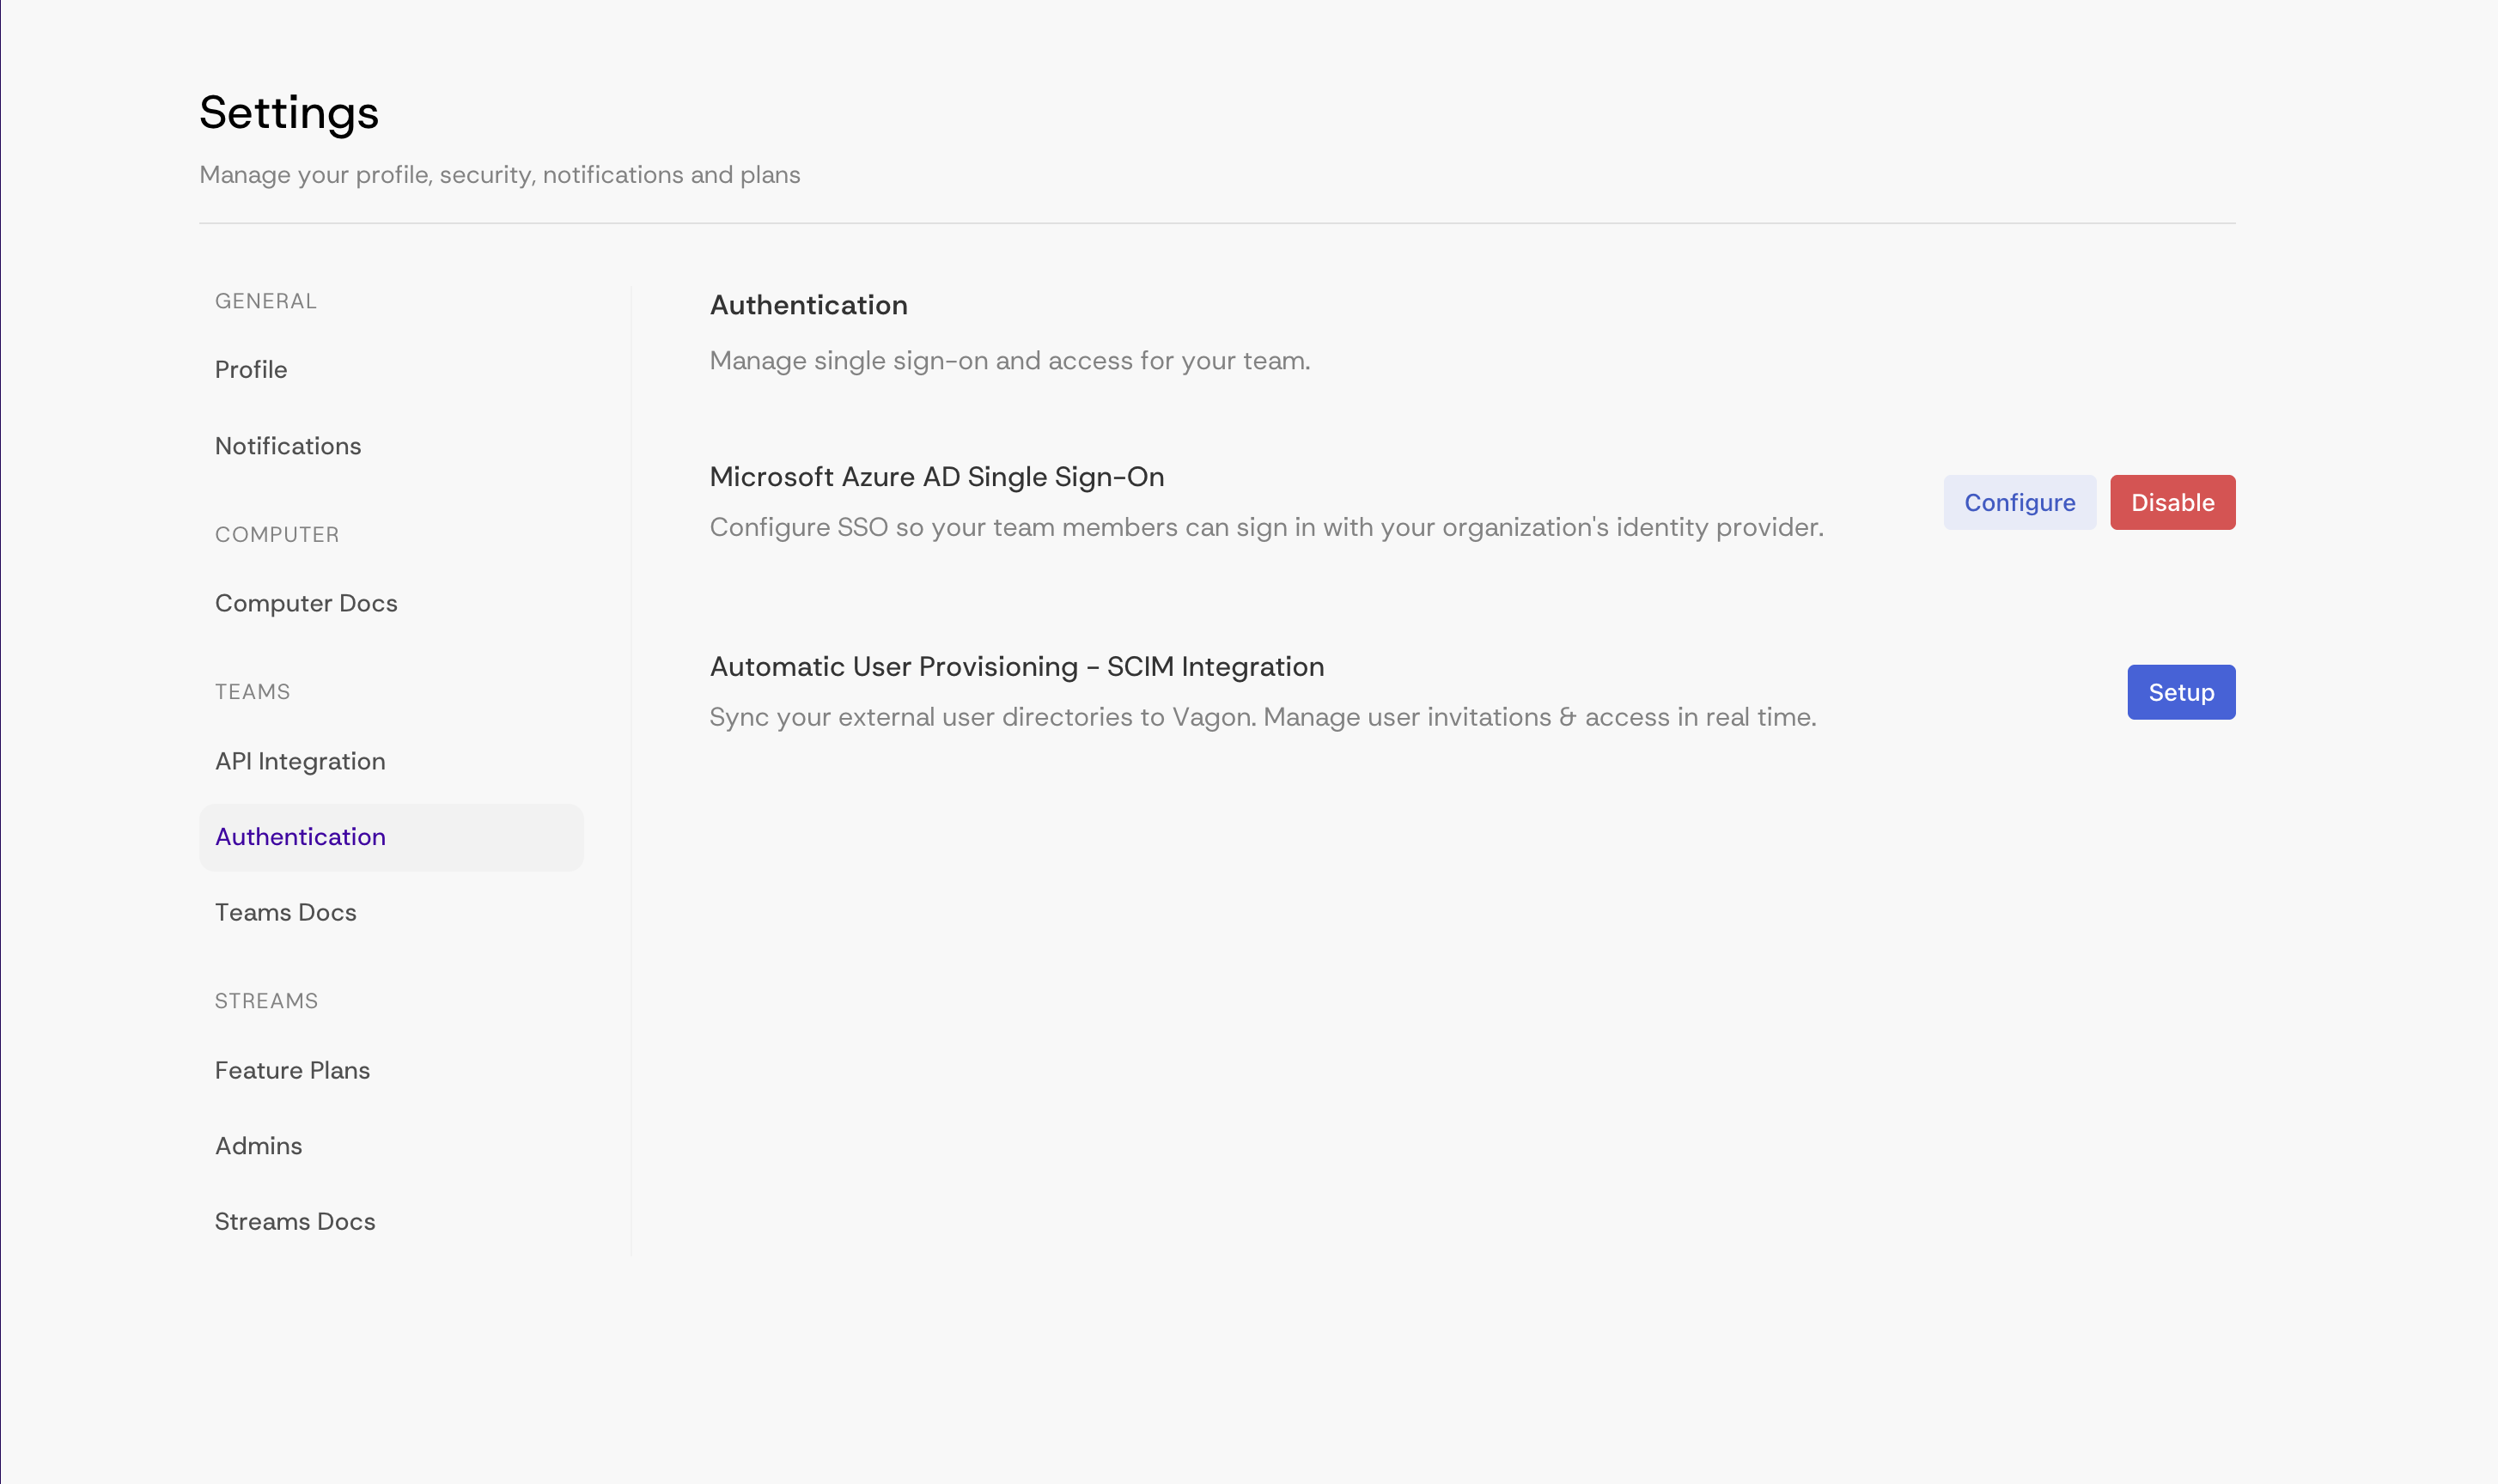
1. Go to **Settings → Authentication** in your Vagon Team Console and find **Automatic User Provisioning – SCIM Integration**.
2. Click **Setup**.
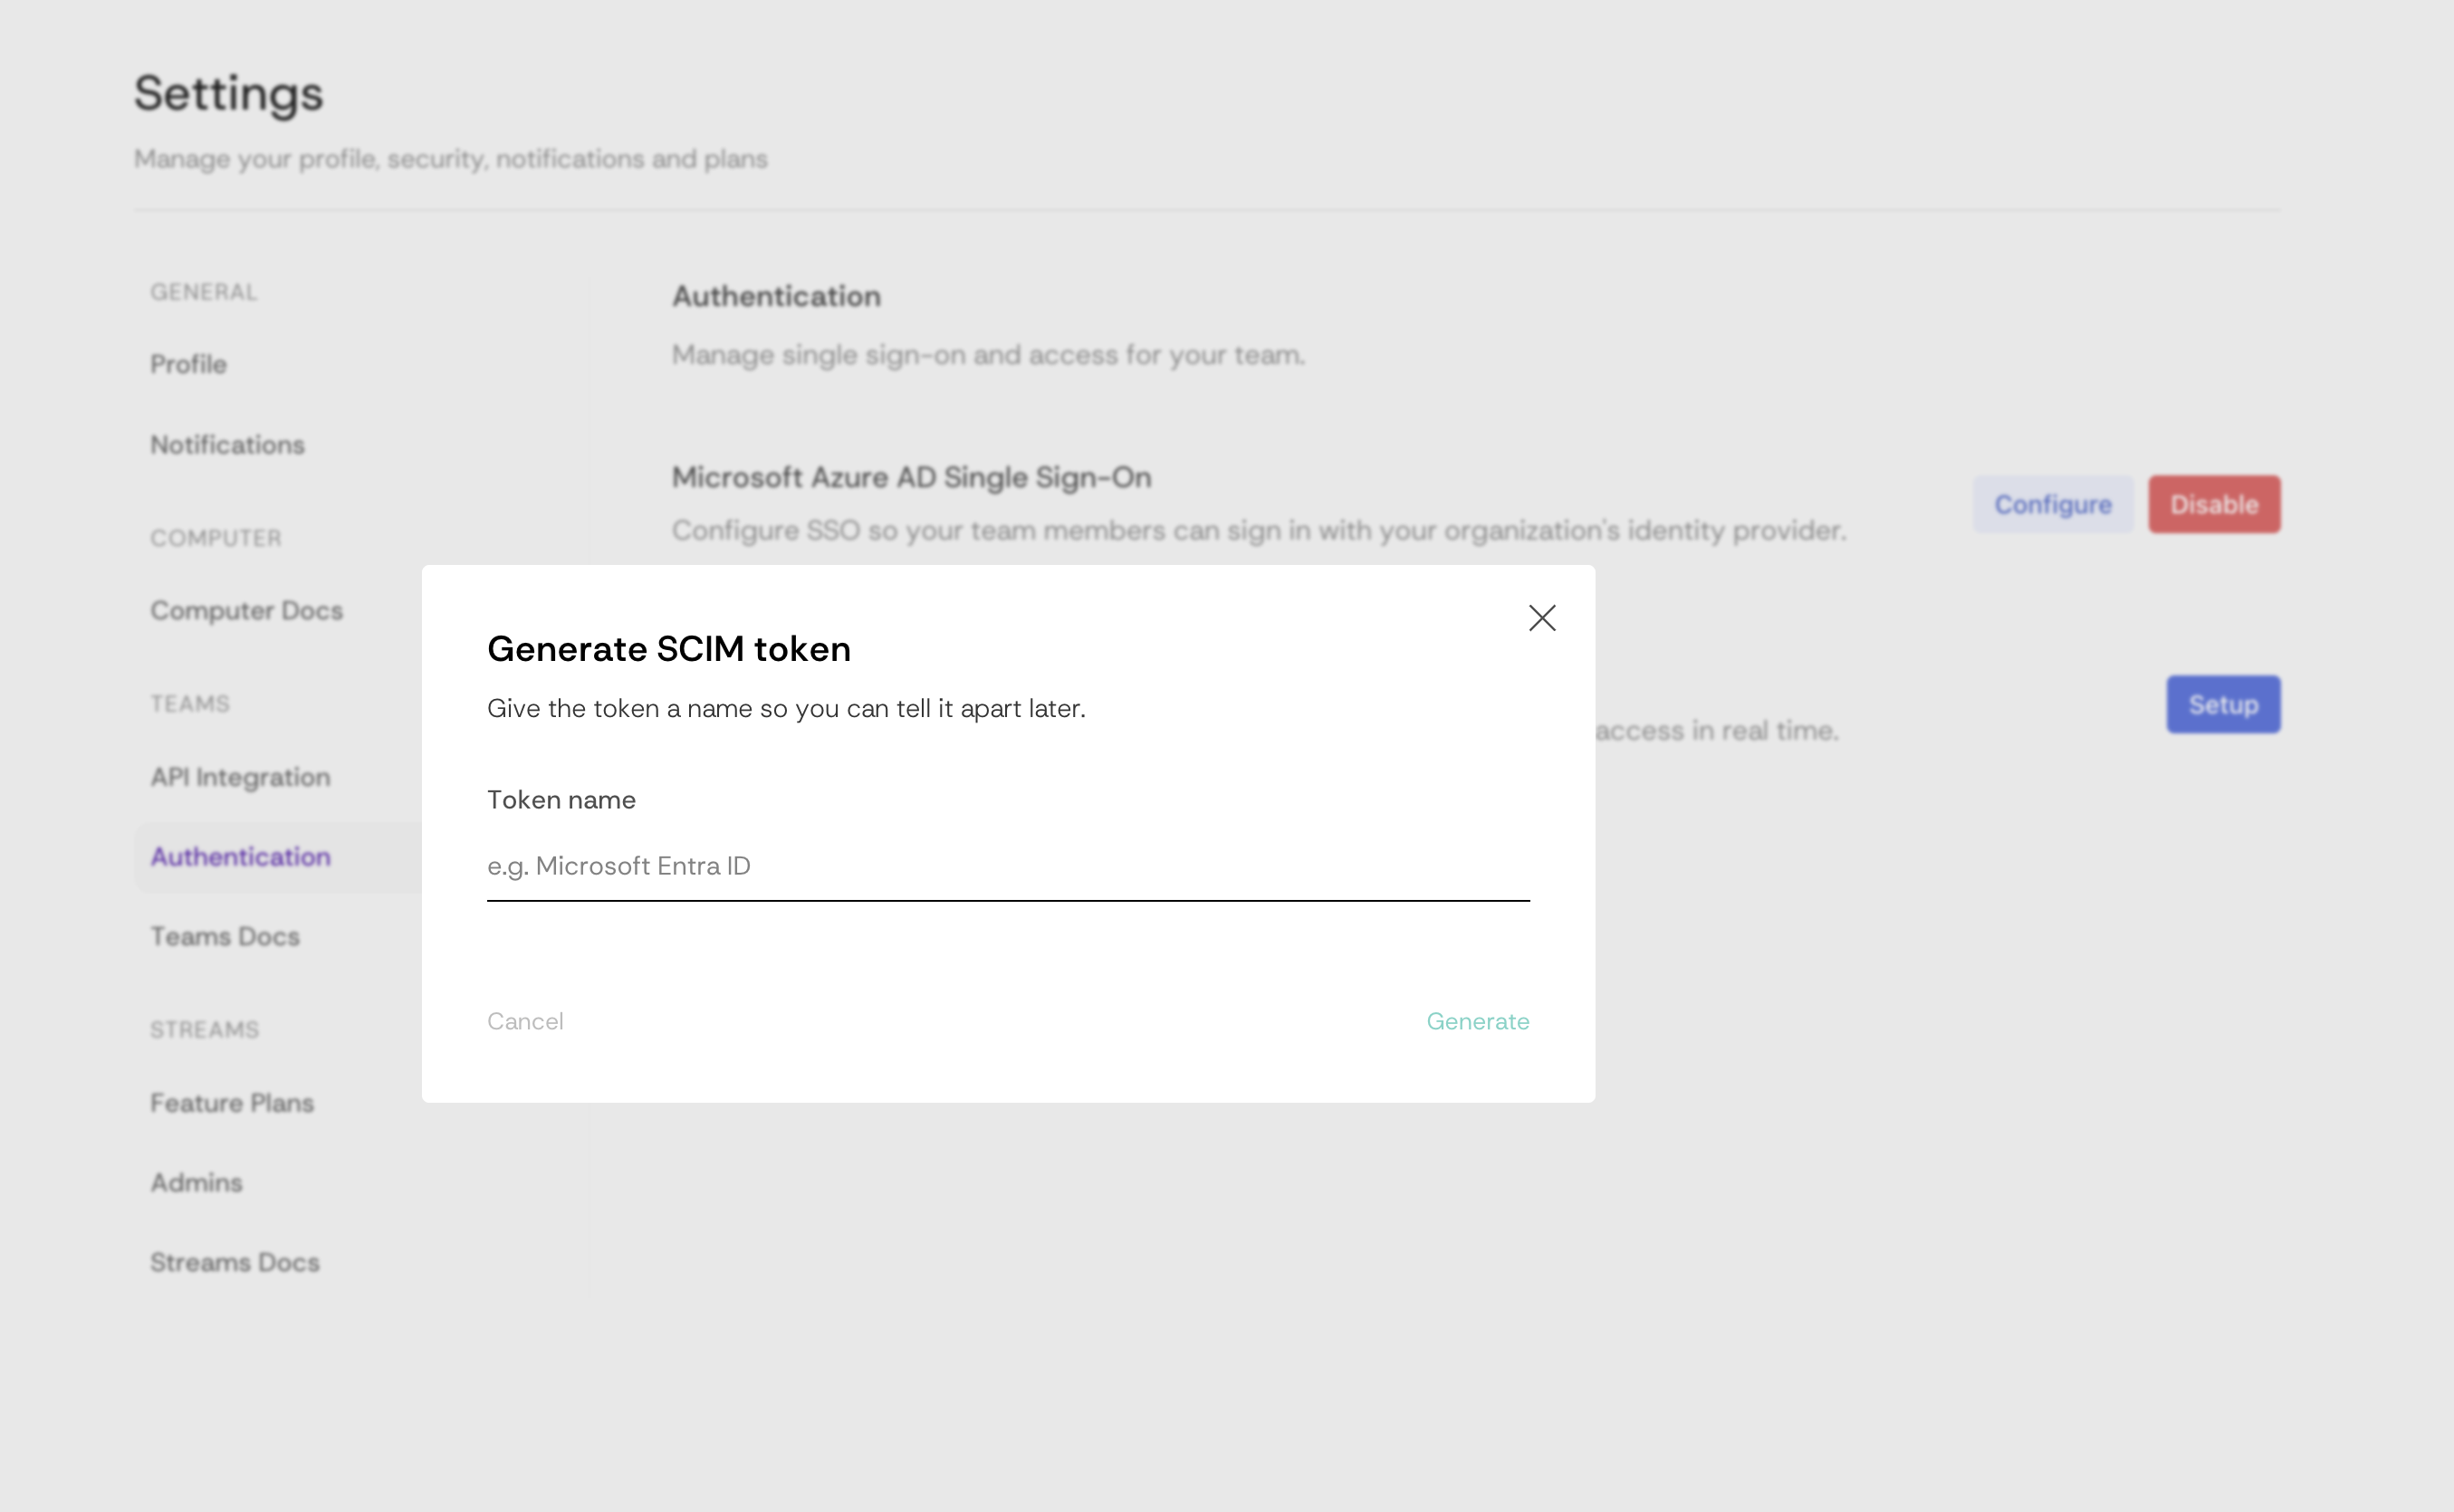
3. Give the token a name so you can tell it apart later — name it after the identity provider you're connecting, for example `Microsoft Entra ID`. Click **Generate**.
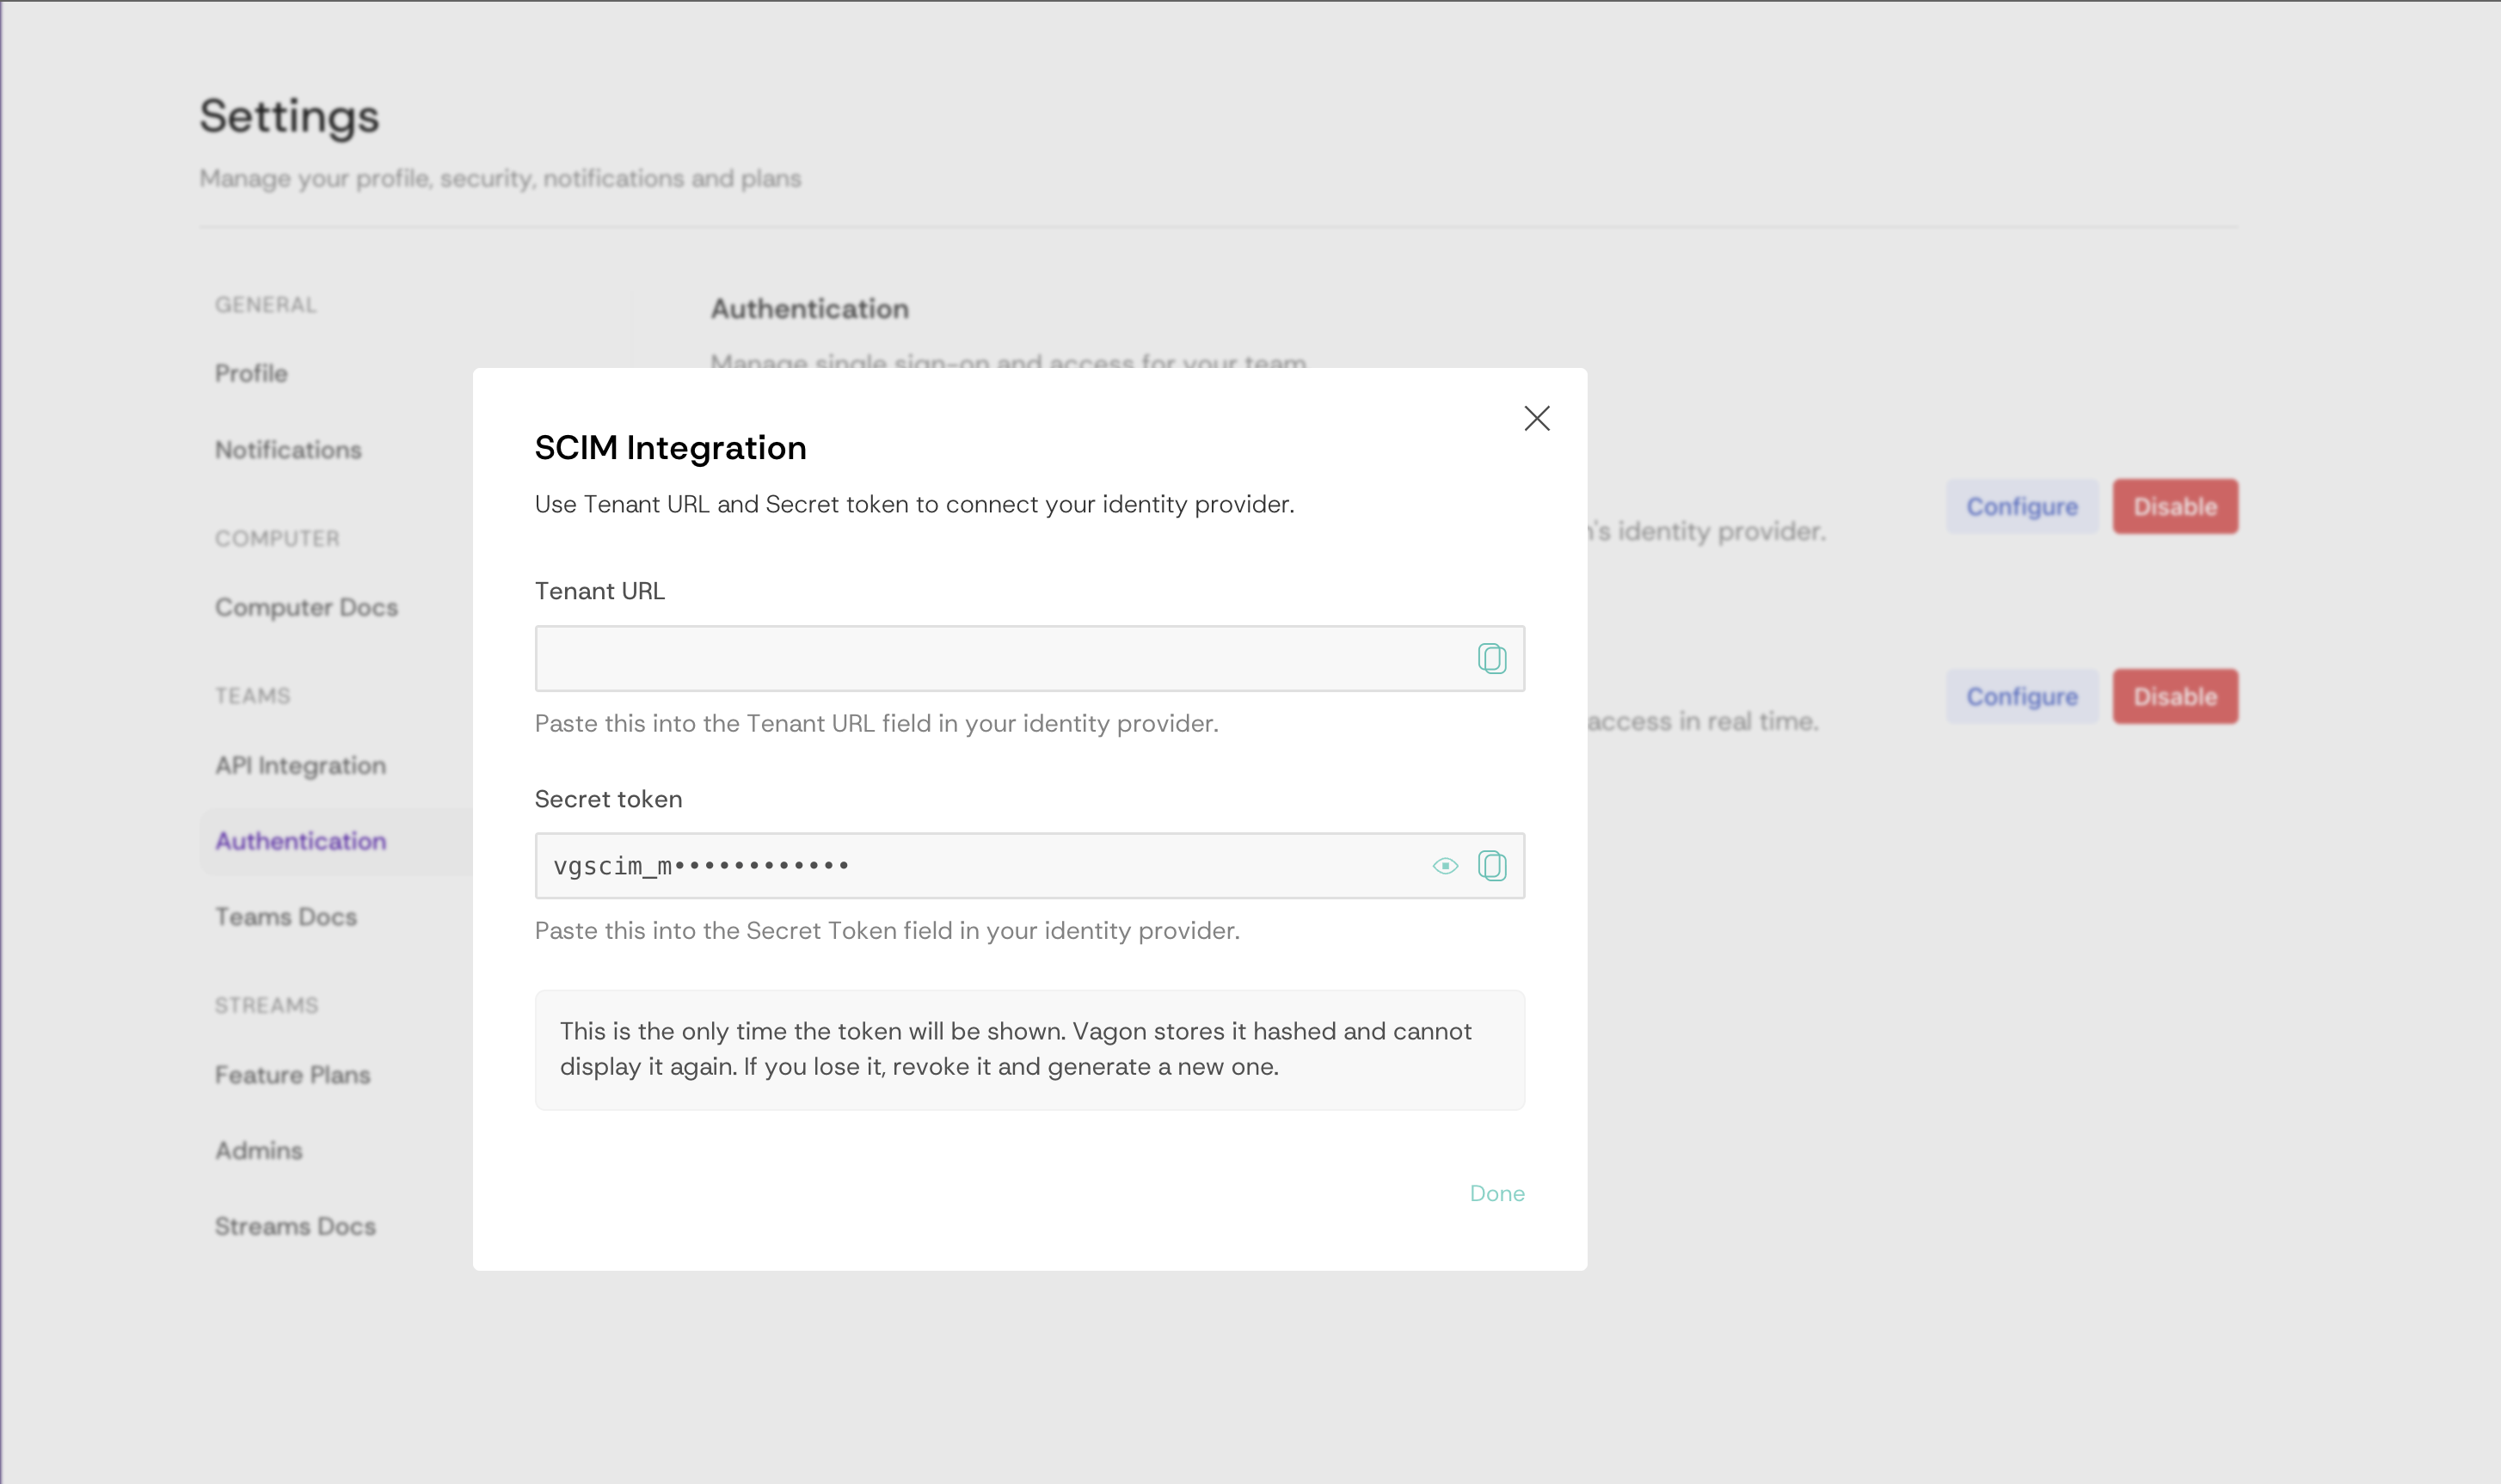
4. Vagon shows you two values. Copy **both** now — you'll paste them into Microsoft Entra in Step 3. Then click **Done**.
* **Tenant URL** — the SCIM endpoint for your organization.
* **Secret token** — the bearer token your identity provider authenticates with.
{% hint style="warning" %}
The **secret token is shown only once.** Vagon stores it hashed and cannot display it again. If you lose it, disable the integration and set it up again with a new token.
{% endhint %}
{% hint style="info" %}
Always copy the **Tenant URL** from your own dashboard rather than typing it by hand. Keep the path exactly as shown — it is case-sensitive, so `/scim/v2/Users` resolves and `/scim/v2/users` does not.
{% endhint %}
Your organization holds **one active SCIM token at a time**, and tokens are not scoped — every token for an organization can see and modify the same resources. This means you connect **one identity provider per organization**.
## Step 2 — Create the application in Microsoft Entra
Vagon is not in the Microsoft Entra app gallery, so you register it as a custom (non-gallery) application.
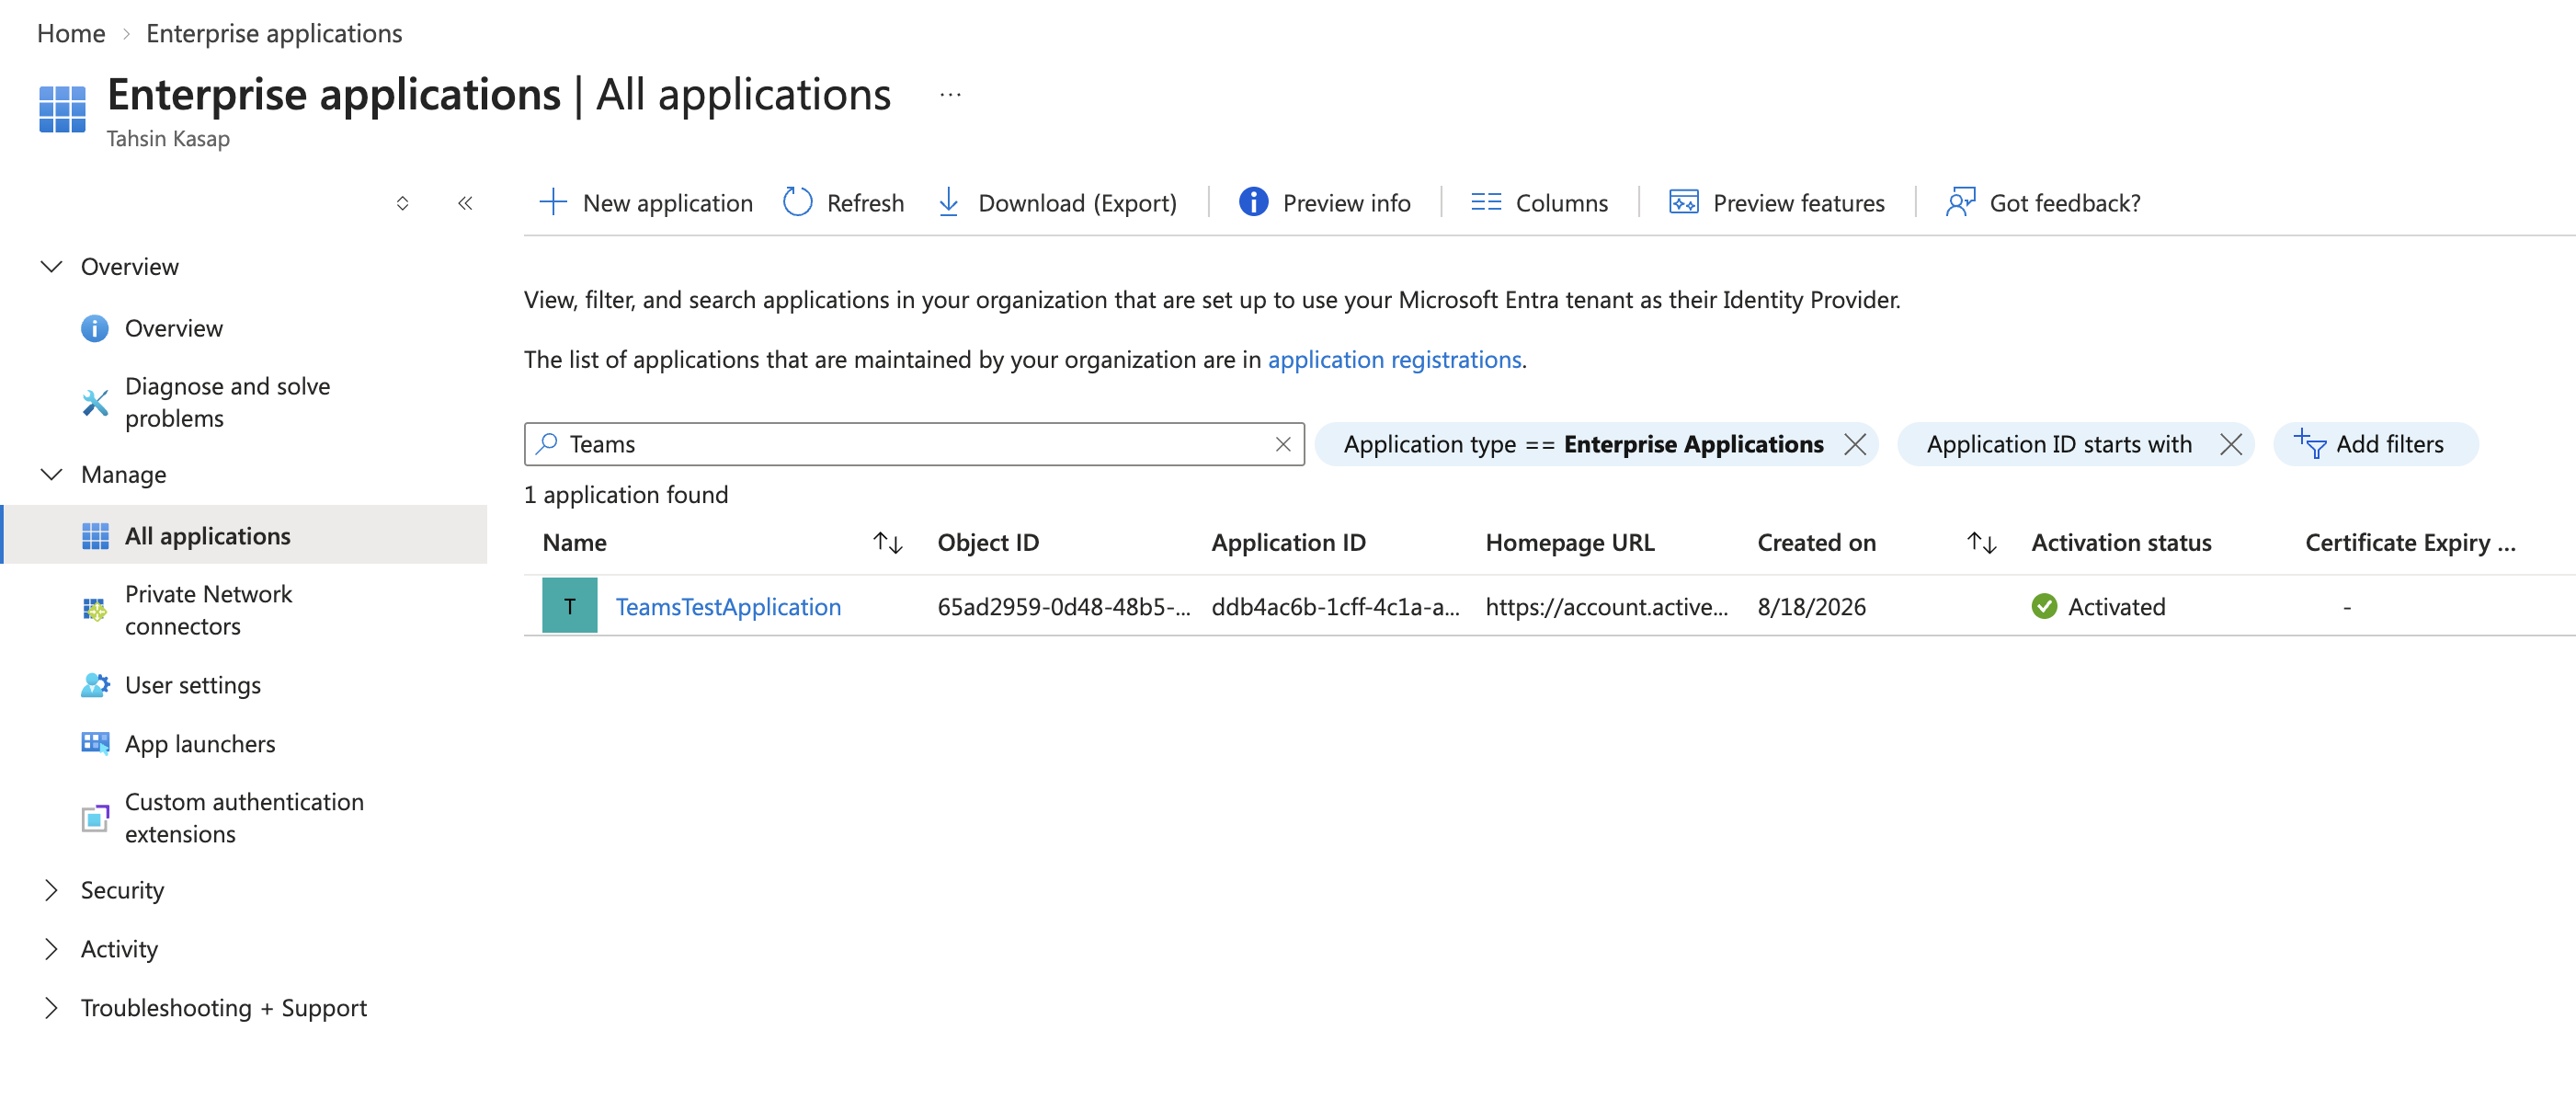
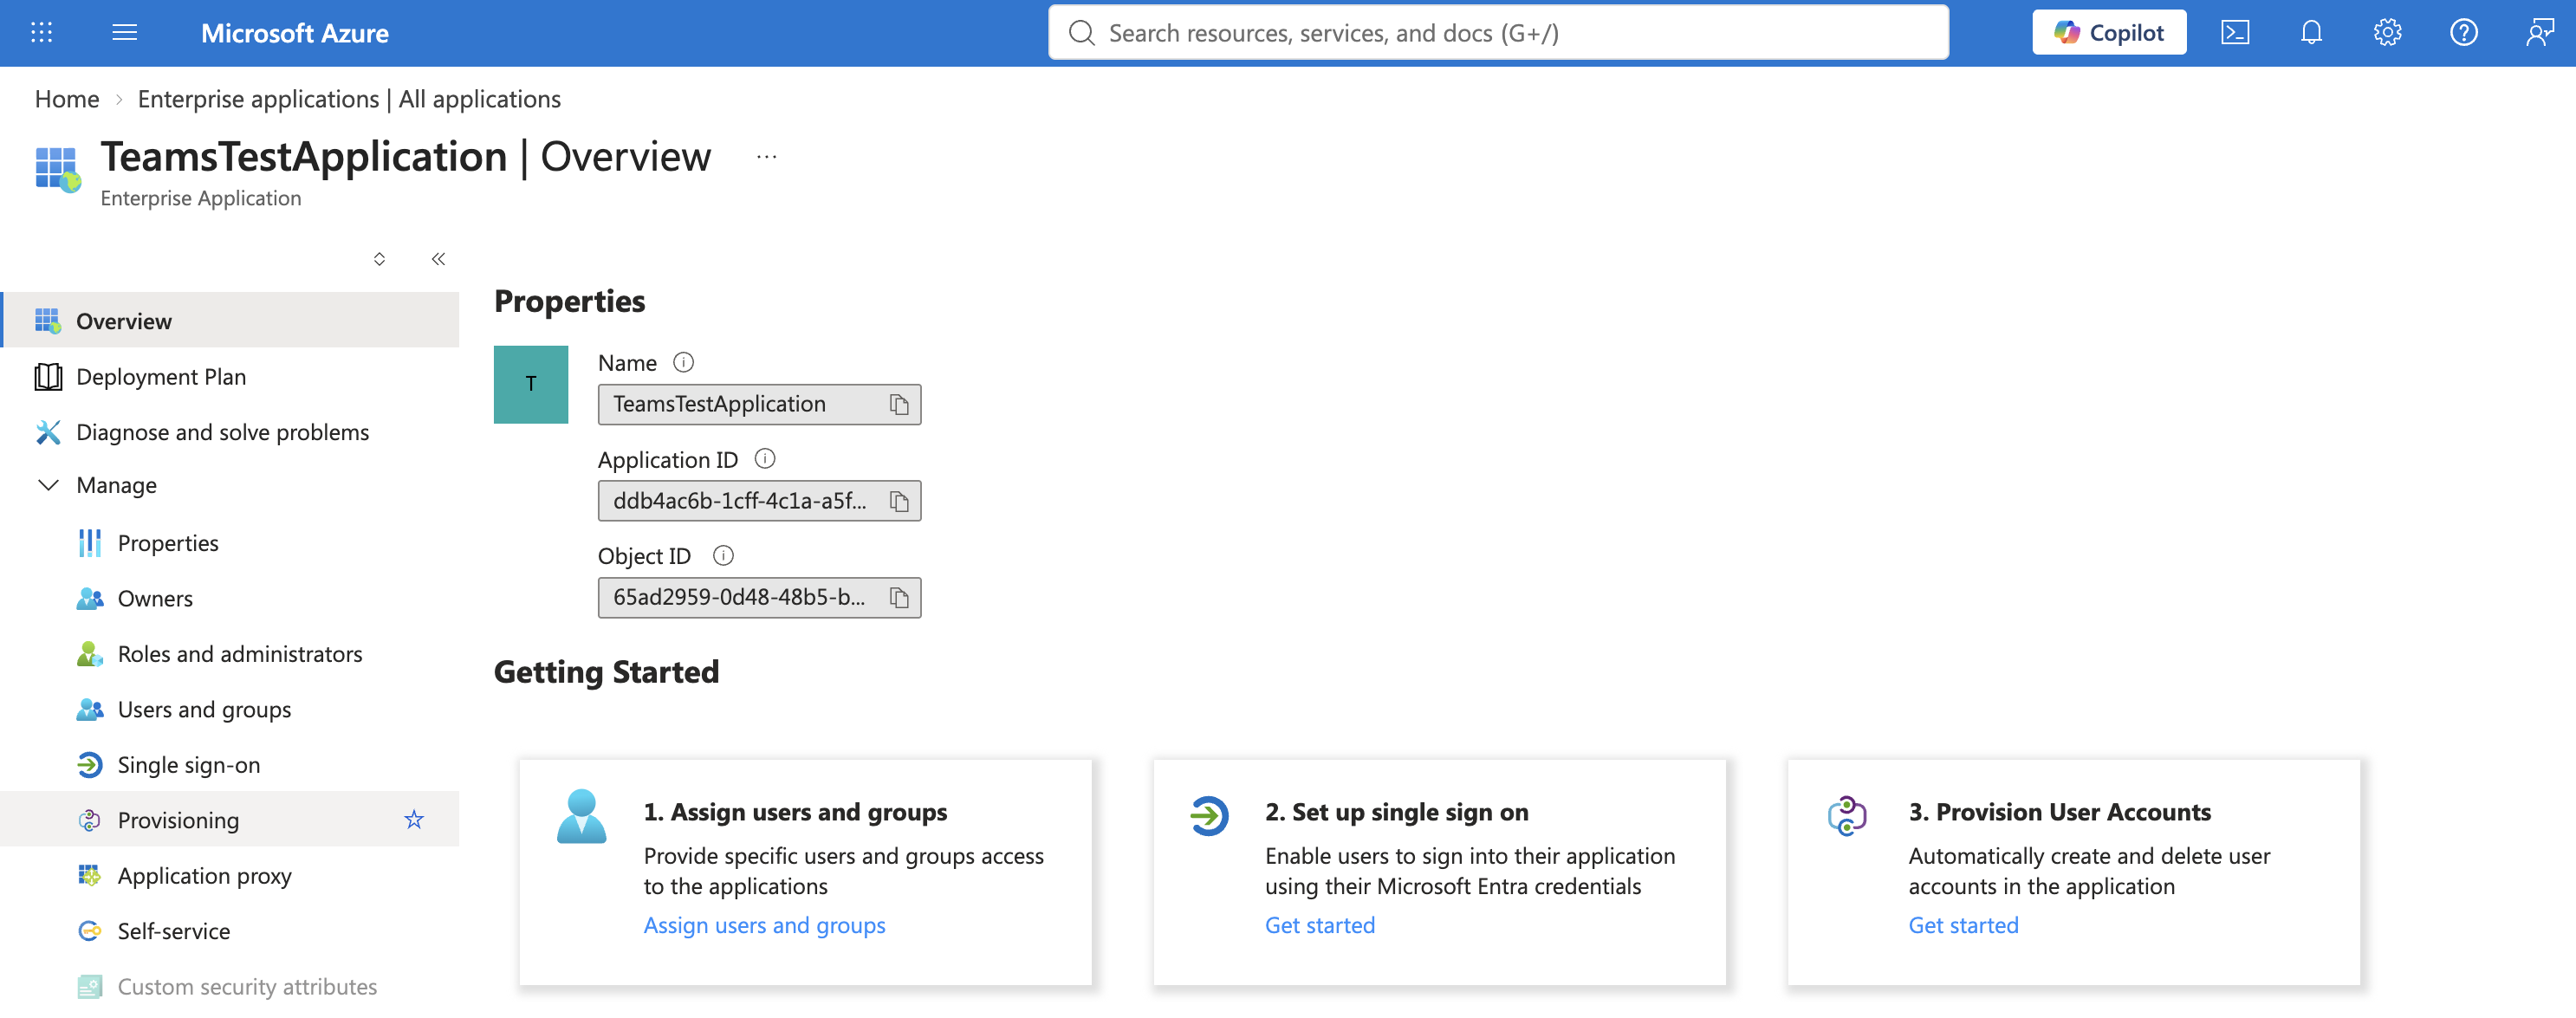
1. Open the [Microsoft Entra admin center](https://portal.azure.com/) and go to **Identity → Applications → Enterprise applications**.
2. Click **New application → Create your own application**, choose **"Integrate any other application you don't find in the gallery"**, give it a name (for example, `Vagon`), and click **Create**.
3. Open the application you just created from the **All applications** list.
{% hint style="info" %}
If you already registered Vagon for [Microsoft Entra SSO](/teams/features/microsoft-entra-sso.md), you can reuse that same enterprise application here instead of creating a second one — just open it and continue from Step 3.
{% endhint %}
## Step 3 — Connect provisioning to Vagon
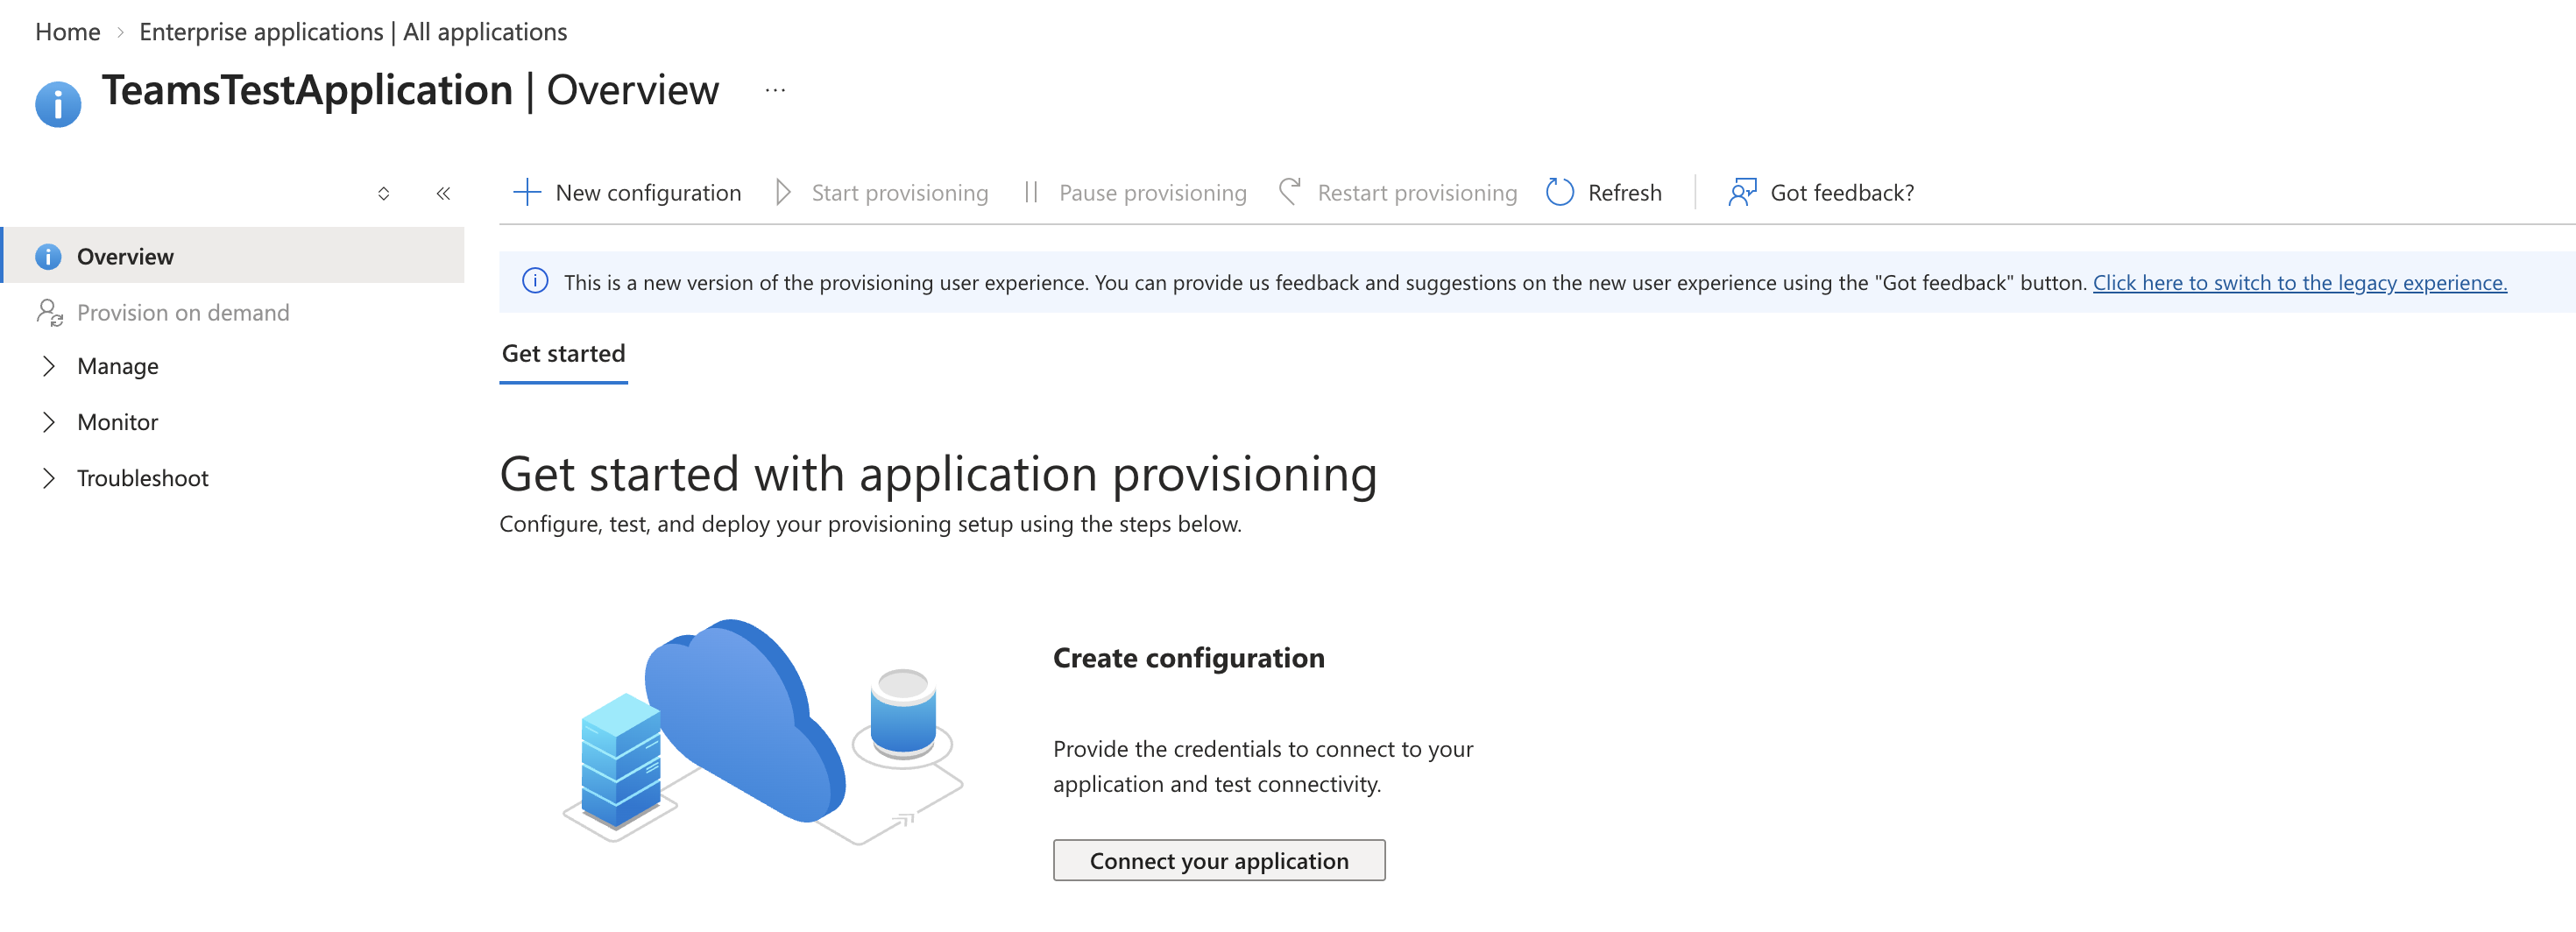
1. In the application's sidebar, open **Provisioning**.
2. Click **New configuration** (or **Connect your application** on the Get started panel).
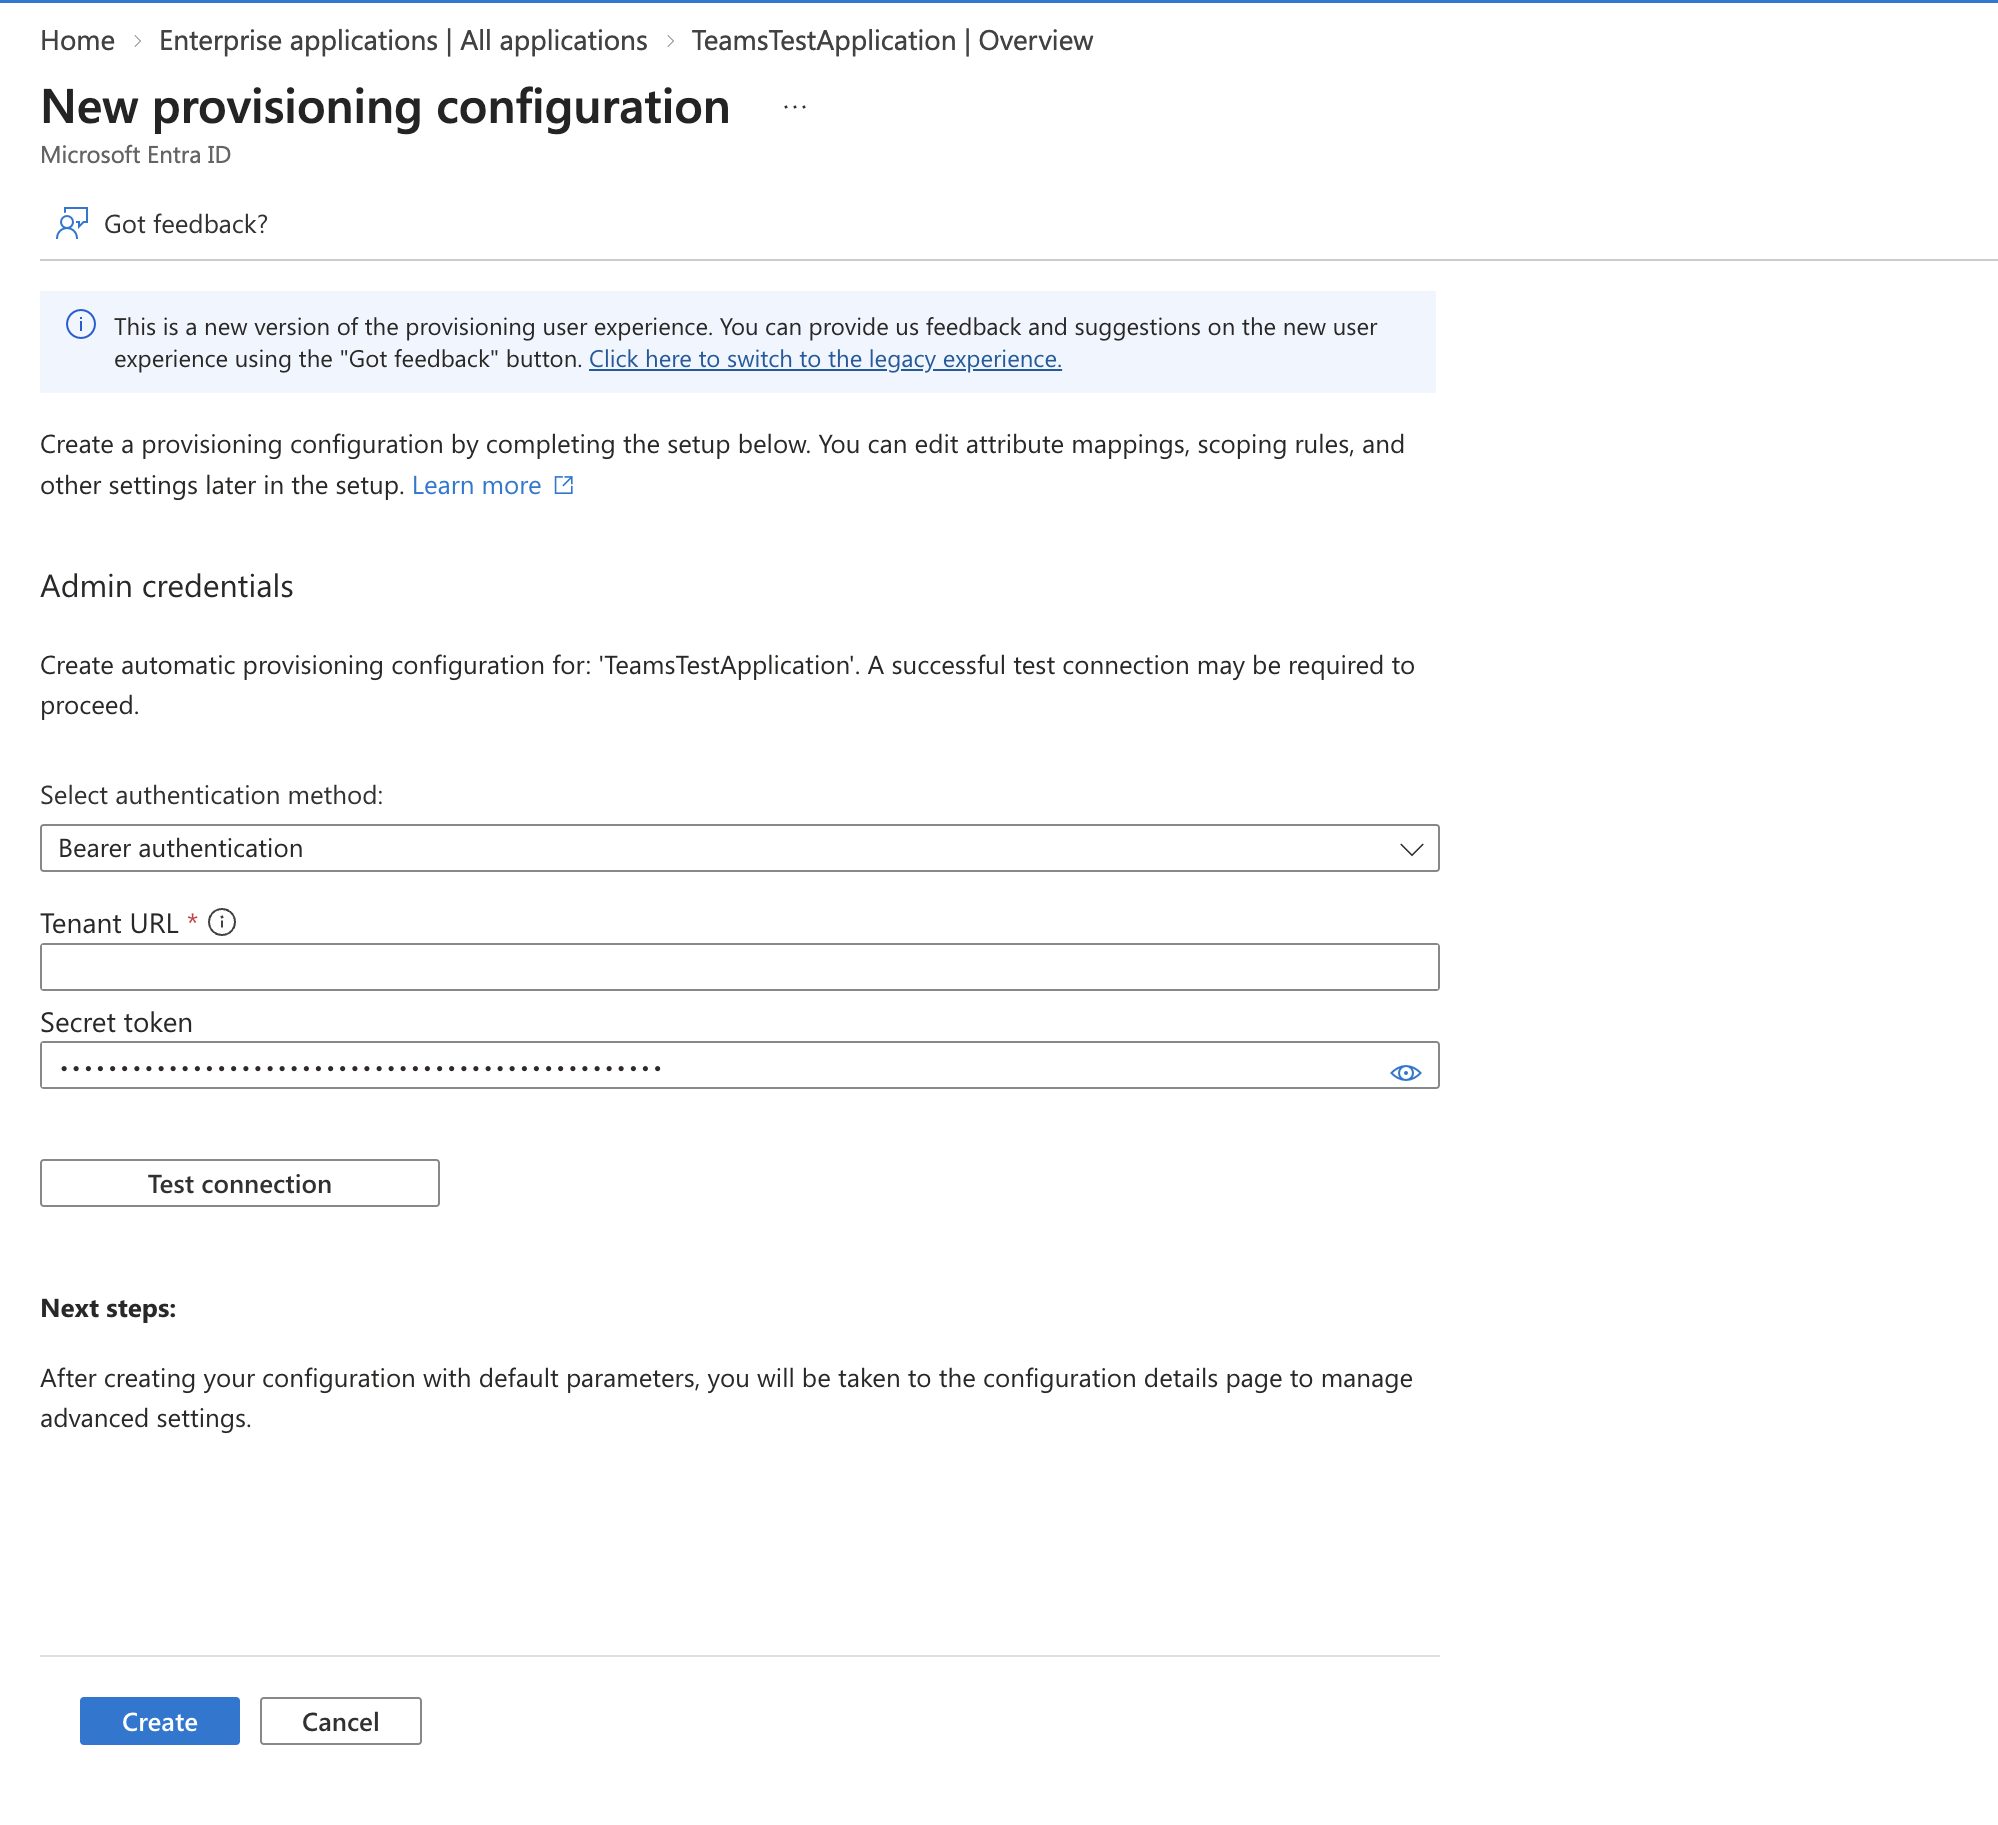
3. Fill in the **Admin credentials**:
| Entra field | Value |
| -------------------------------- | ------------------------------------------------ |
| **Select authentication method** | Bearer authentication |
| **Tenant URL** | The Tenant URL you copied from Vagon in Step 1 |
| **Secret token** | The Secret token you copied from Vagon in Step 1 |
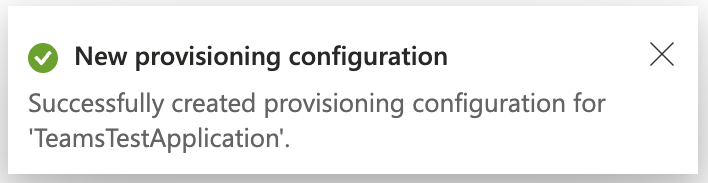
4. Click **Test connection**. You should see *Connection test was successful*. Then click **Create**.
{% hint style="info" %}
Microsoft Entra offers a new and a legacy provisioning experience, and the screenshots here use the new one. On the legacy screens the same step is **Provisioning Mode: Automatic → Admin Credentials**; the fields and the values you paste are identical.
{% endhint %}
## Step 4 — Choose who gets provisioned
Vagon only creates the users Entra sends it, so scope the sync deliberately.
1. Under the provisioning configuration, open **Manage → Provisioning settings** and set **Scope** to **Sync only assigned users and groups**.
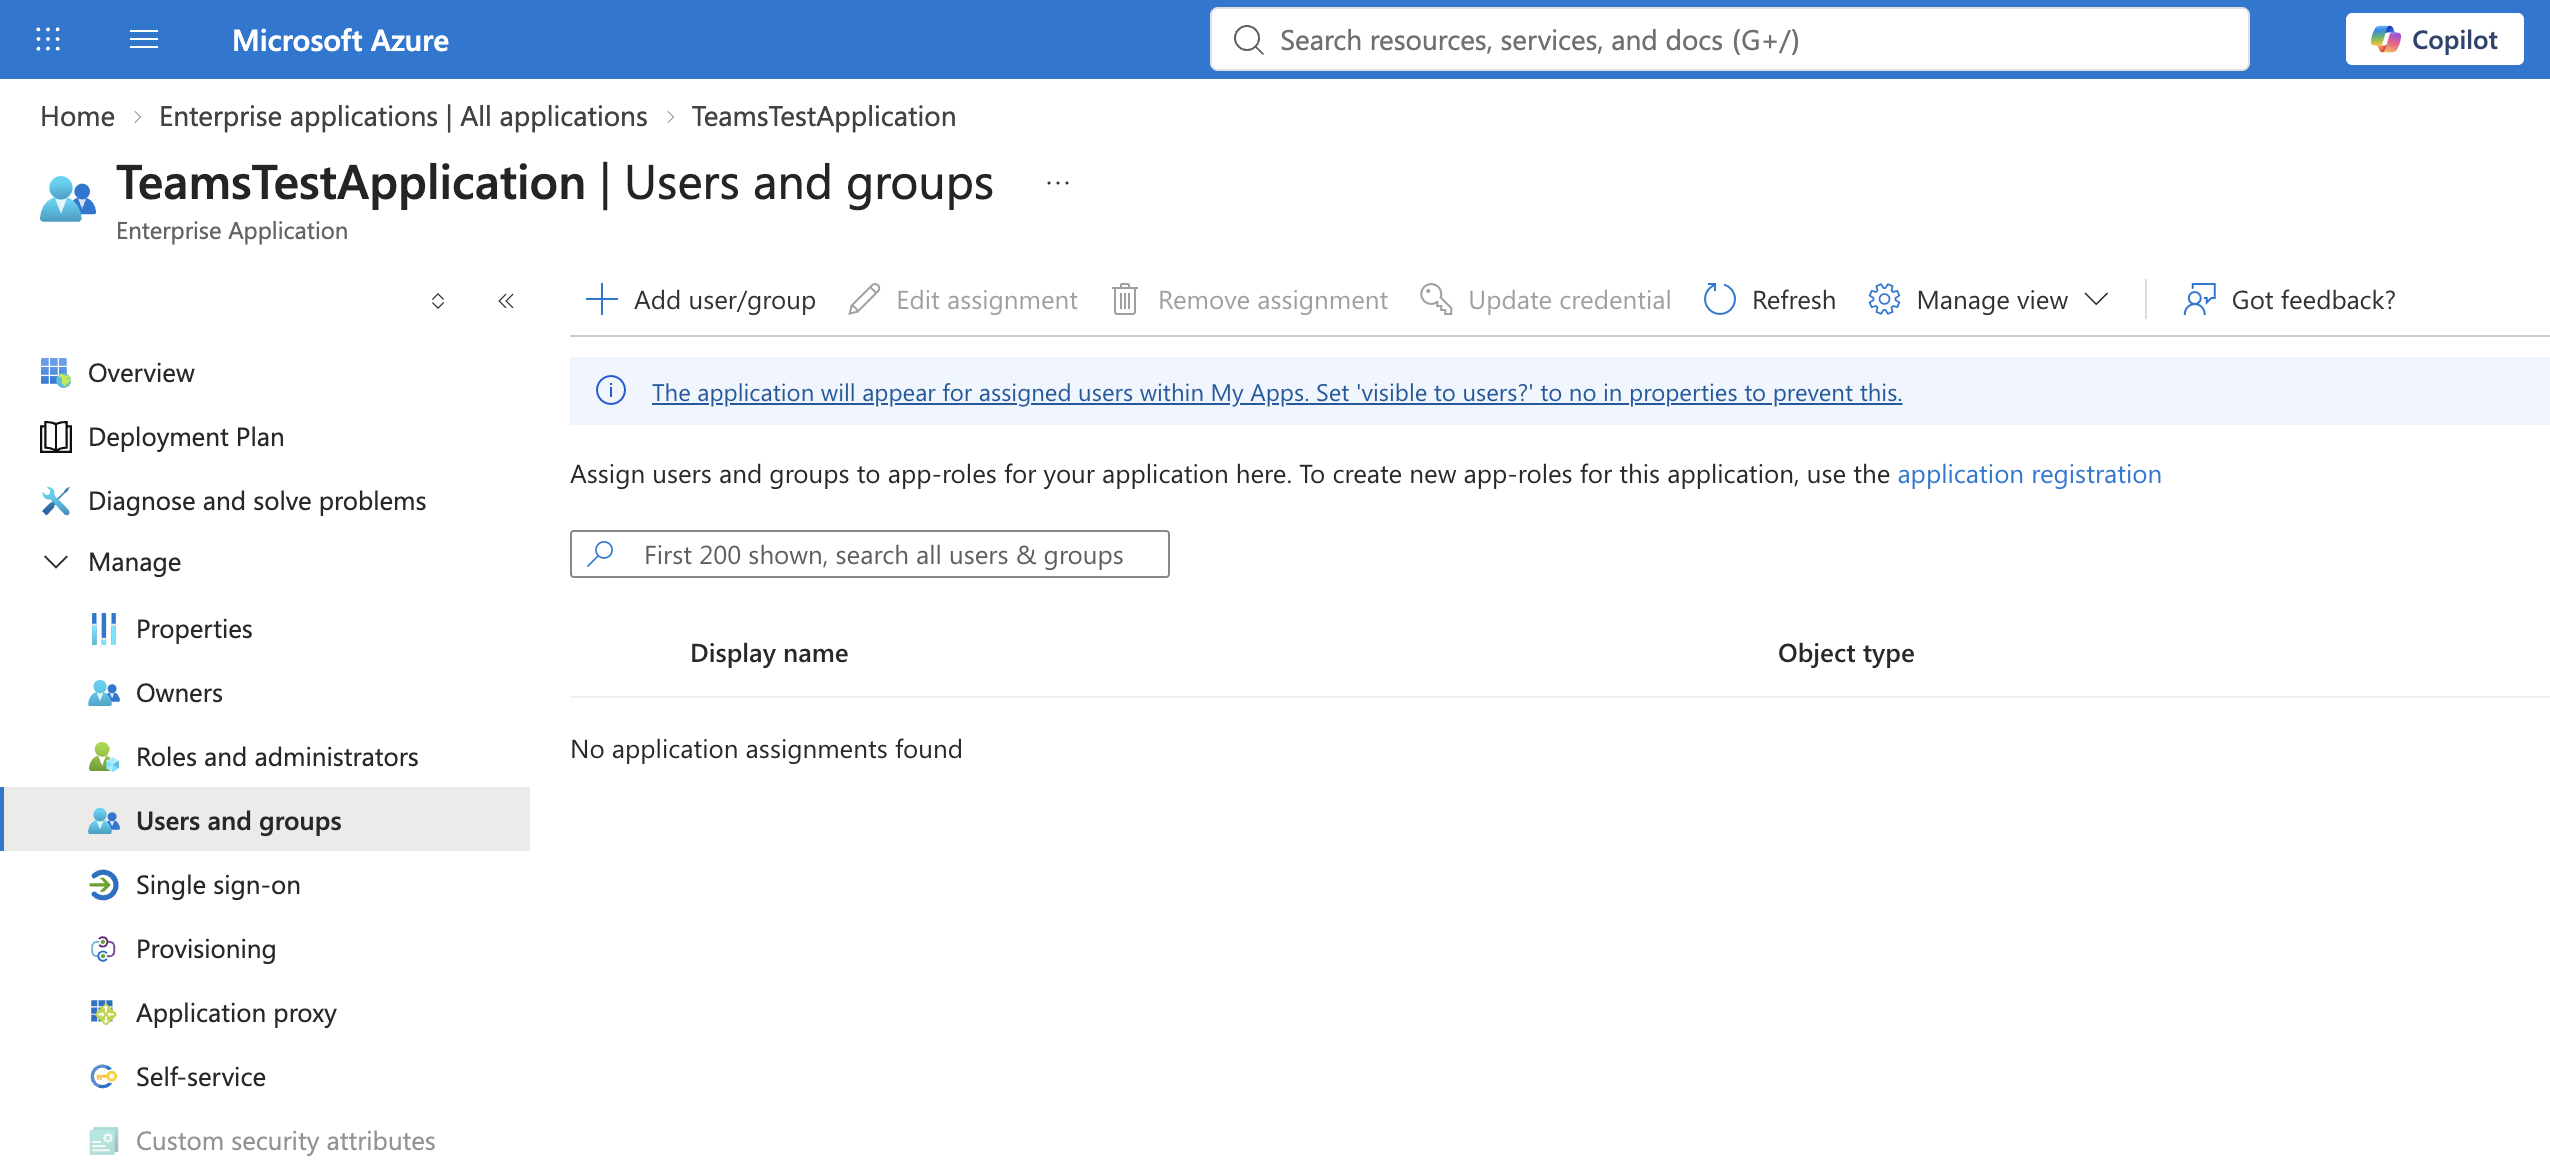
2. Go back to the application and open **Users and groups**.
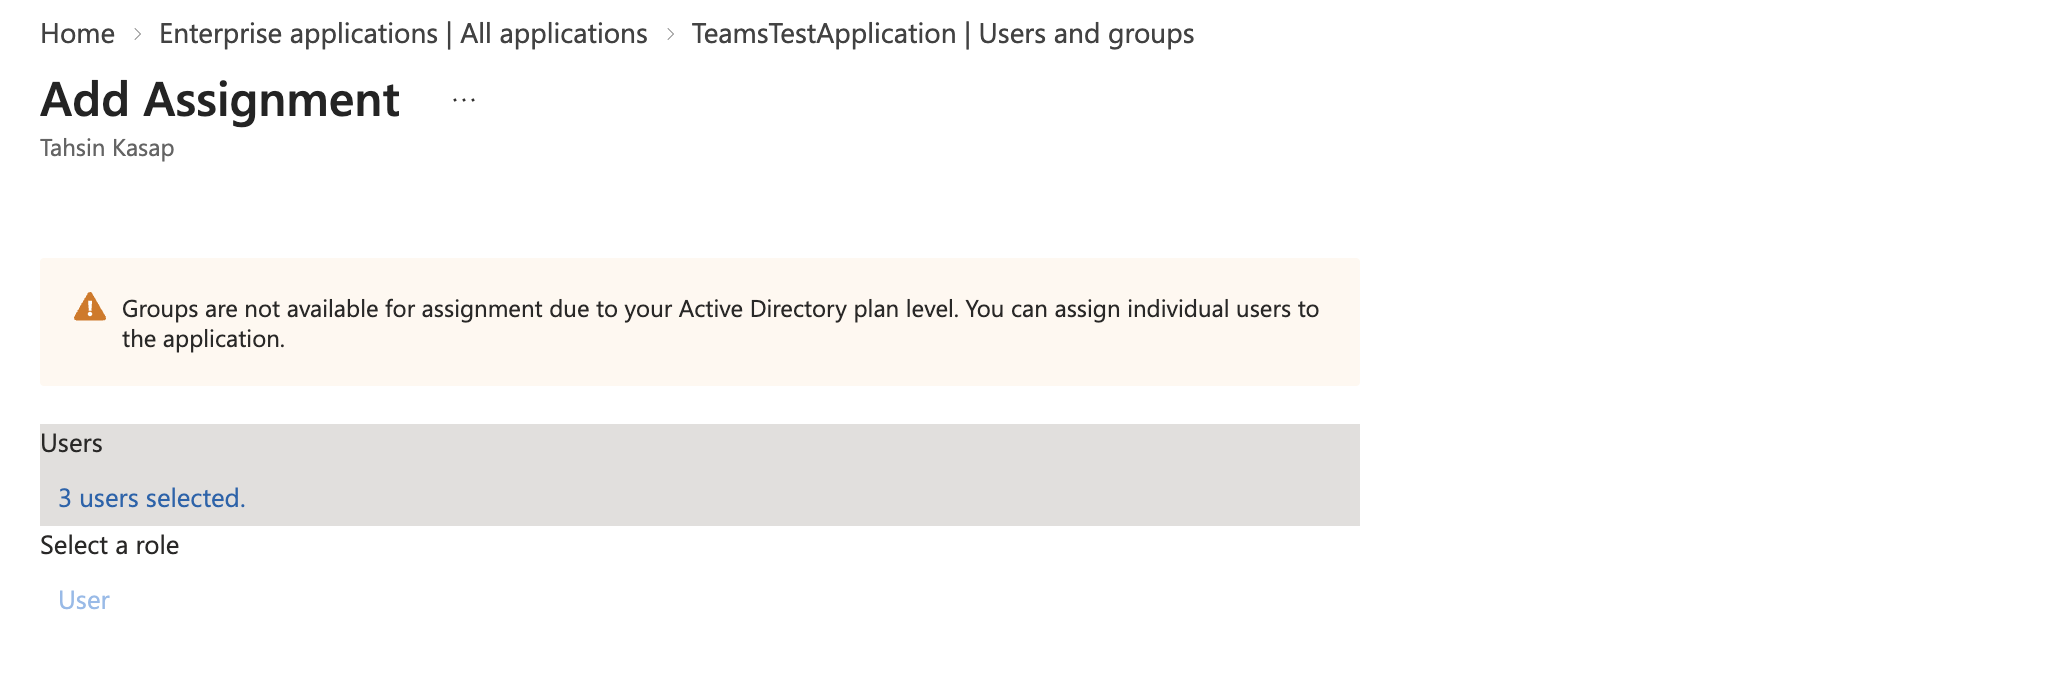
3. Click **Add user/group**, select the people (or groups) who should have Vagon access, and click **Assign**.
{% hint style="info" %}
Keep the matching attribute as **`userName`**. Vagon supports filtering on `userName` and `externalId` only, so matching on any other attribute will fail.
{% endhint %}
## Step 5 — Provision admins automatically (optional)
By default everyone provisioned through SCIM joins as a **member**. If you want your directory to decide who is an organization **admin**, map Vagon's `isAdmin` attribute.
1. Open **Manage → Attribute mapping**, select the **Provision Microsoft Entra ID Users** mapping, and click **Edit attribute list** (shown as *customappsso*).
2. At the bottom of the list, click **+ Add new attribute** and add:
* **Name** — `urn:vagon:params:scim:schemas:extension:2.0:User:isAdmin`
* **Type** — `Boolean`
3. Click **Save**.
4. Back in **Attribute mapping**, add a mapping that assigns a value to `isAdmin` — for example from an app role or a directory attribute.
{% hint style="info" %}
Vagon accepts the attribute under its full URN or as a plain `isAdmin`, which is what Entra sends if you leave the URN off the attribute name. Either works.
{% endhint %}
**How Vagon interprets `isAdmin`:**
* **Not sent at all means unchanged.** A directory that doesn't map `isAdmin` will never demote your existing admins. Only an explicit `false` demotes someone to member.
* **The organization owner is never affected.** `isAdmin` cannot grant or remove ownership — admin is the highest role SCIM can assign.
* **A demotion revokes that person's access tokens**, so admin privileges stop immediately rather than lasting until their session expires. Promotions don't revoke anything.
* If the person hasn't accepted their invitation yet, the role is recorded and applied the moment they do.
{% hint style="warning" %}
**Set the source attribute before the user enters scope.** Entra omits empty source attributes from the payload entirely, so a user created in Vagon before `isAdmin` has a value arrives as a member — the role then follows on the next sync cycle once the value changes. The same applies if you add the mapping after users are already syncing. Use **Restart provisioning** to force a full re-sync, or **Provision on demand** to push one user immediately.
{% endhint %}
## Step 6 — Test, then turn provisioning on
Before switching the sync on for everyone, push a single user through it.
1. Open **Provision on demand**, pick one assigned user, and run it.
2. All four steps — *Import user*, *Determine if user is in scope*, *Match user between source and target system*, *Perform action* — should report **Success**. Open **View details** on **Perform action** to see exactly which attributes were sent.
3. Check that the person received a Vagon invitation, then set **Provisioning Status** to **On** and save.
Microsoft Entra runs an initial full sync immediately, then an incremental cycle roughly **every 40 minutes**. Changes you make in your directory won't appear in Vagon instantly — use **Provision on demand** when you need one user pushed through straight away.
***
## Managing the integration
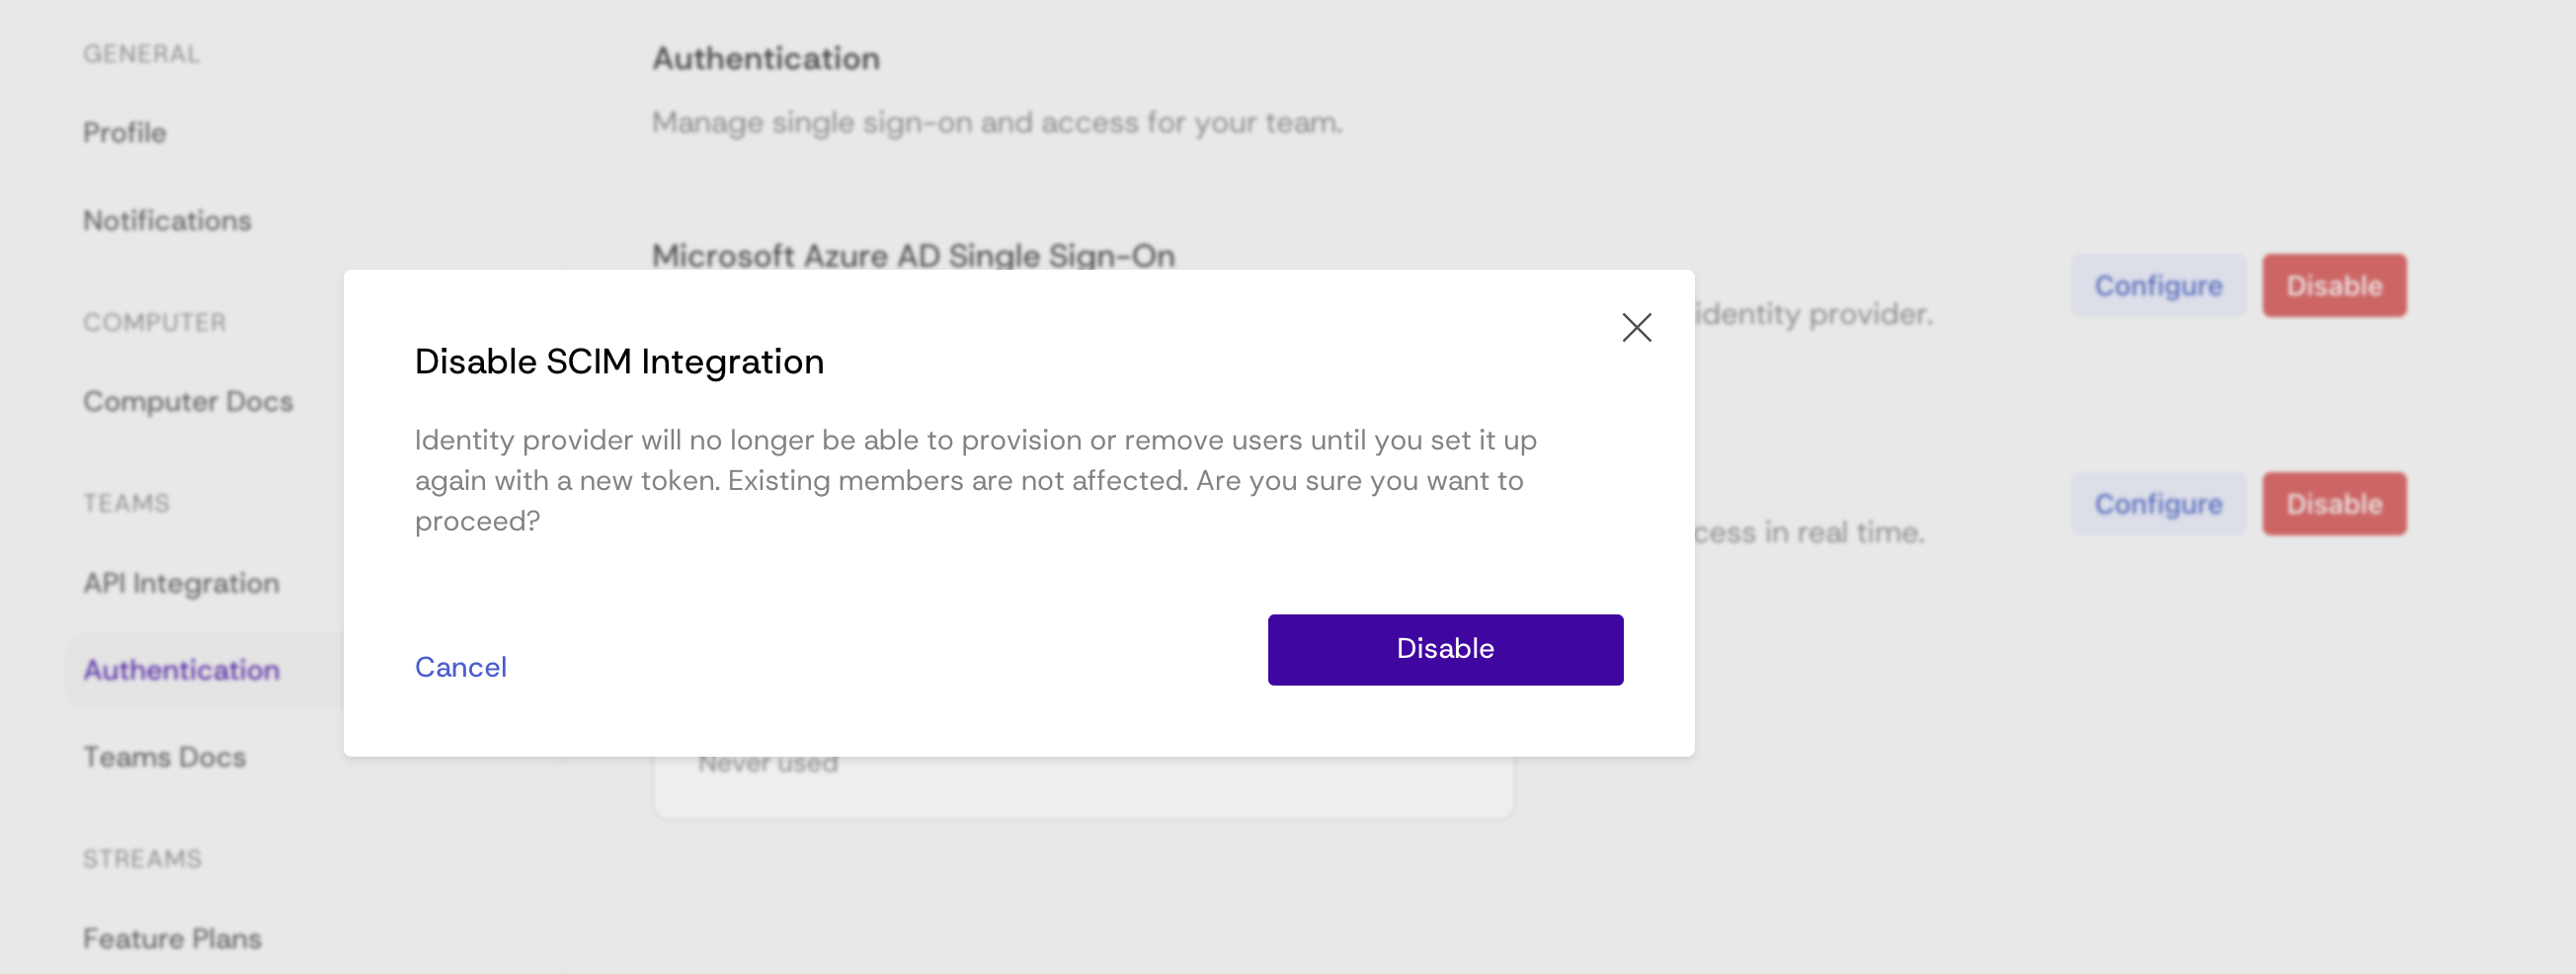
Once SCIM is set up, the **Automatic User Provisioning – SCIM Integration** row in your Authentication settings offers **Configure** and **Disable** instead of **Setup**. Configure shows the active token, its name, and when it was last used.
* **Rotating a token** — disable the integration, set it up again to generate a new token, and paste the new value into Microsoft Entra. Provisioning pauses in between, which in practice is one sync cycle.
* **Disabling the integration** — your identity provider can no longer provision or remove users until you set it up again with a new token. **Existing members are not affected** — nobody loses access, and nobody is deprovisioned, because you turned SCIM off.
{% hint style="info" %}
Disabling SCIM stops the sync but leaves your team exactly as it is. If you need to remove someone's access, do it in Vagon or in your directory — turning the integration off won't do it for you.
{% endhint %}
If you need help, reach out to us at .